How to Enable High DPI for Windows 365 Cloud PC
In this article, we will show you how to enable high DPI for Windows 365 Cloud PC. After connecting to the Cloud PC via the windows365.microsoft.com web client, you can enable a higher screen resolution in the session settings.
In addition to the high DPI feature, you can also turn on hardware acceleration for your Cloud PC. It improves motion performance for tasks like scrolling, moving windows, or playing back videos and is on by default.
Let’s first define high DPI. On high-resolution displays, text, images, and UI components appear much sharper and easier to read; however, the operating system must scale up to support the visual experience; otherwise, everything just appears smaller. Third-party Windows applications can leverage High DPI settings and adjust the user interface accordingly, by declaring themselves High DPI aware.
When youconnect to your Cloud PCusing a high-resolution display and notice that the icons, images, and overall display are not sharper, you can turn on the high DPI option on your Cloud PC to enable higher screen resolution.
Also Read:How to Enable Camera Access for Windows 365 Cloud PC
High-DPI Support for Cloud PCs
The high DPI works for Cloud PCs running both Windows 10 and Windows 11. The physical device that you are using to connect to the Cloud PC must have a higher screen resolution to best utilize the high-DPI feature.
We also noticed the display was much sharper when the high DPI was turned on for Cloud PC on a Mac device. Macs use retina displays, and you will undoubtedly see crisper and clearer images on a Retina display than you will on a lot of other devices.
See Also:Turn on Location Redirection for Windows 365 Cloud PC
Enable High DPI for Windows 365 Cloud PC
The option to turn on the high DPI is only available when you connect your Cloud PC using thewindows365.microsoft.com web client. Here’s how you can enable high DPI for Windows 365 Cloud PC.
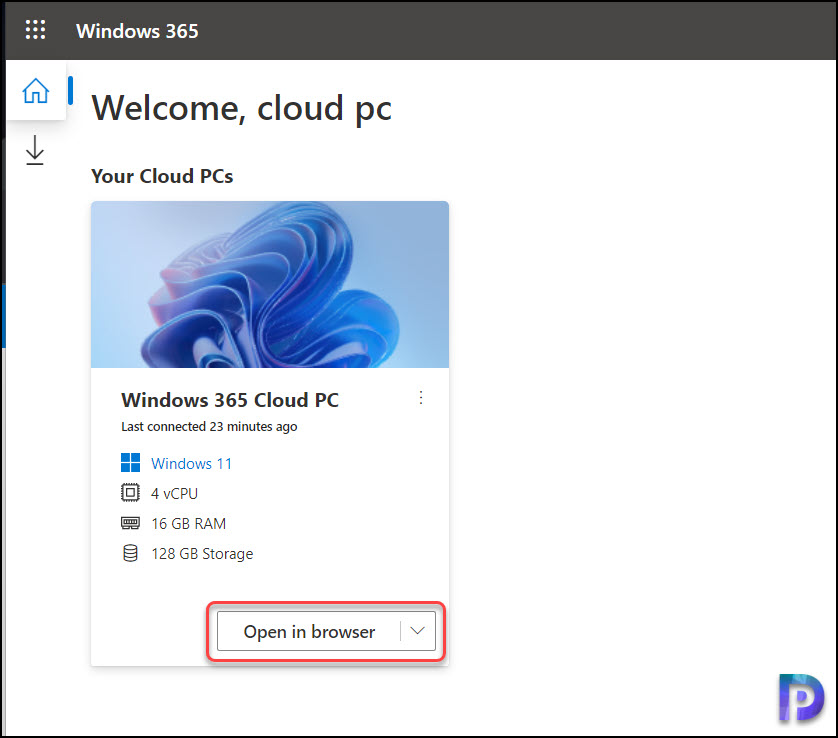
1. Launch the browser on your PC and browse tohttps://windows365.microsoft.comto access your Cloud PCs. On the Windows 365 home page, you can see the Cloud PCs that you can access inthe Your CloudPCs section. Select the option “Open in browser” to connect to it.

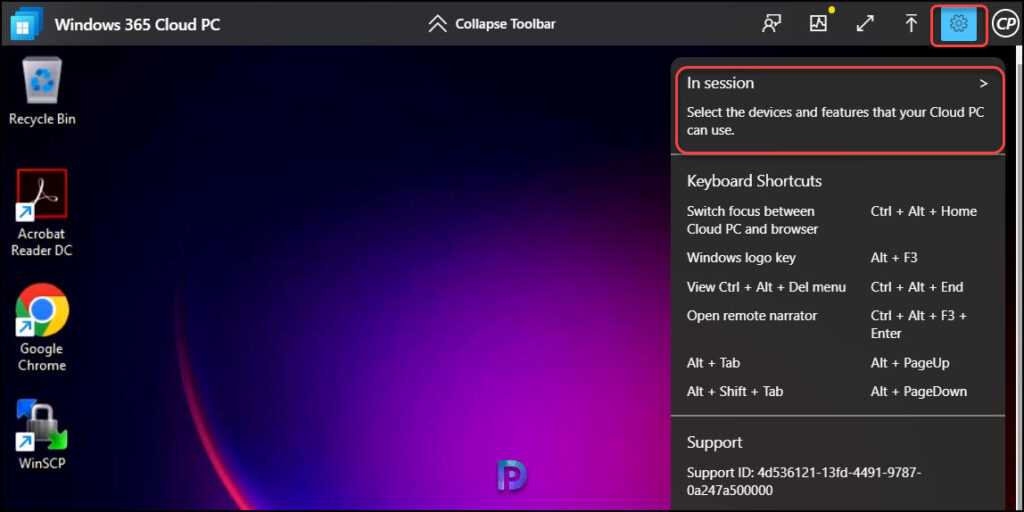
2. Once you are logged in to the Cloud PC, click on theSettingsicon located in the top-right corner of the screen to display a drop-down menu. From the drop-down panel, select the first option, “In session“. The In session settings allow you to select the devices and features that your Cloud PC can use when you are connected to it.

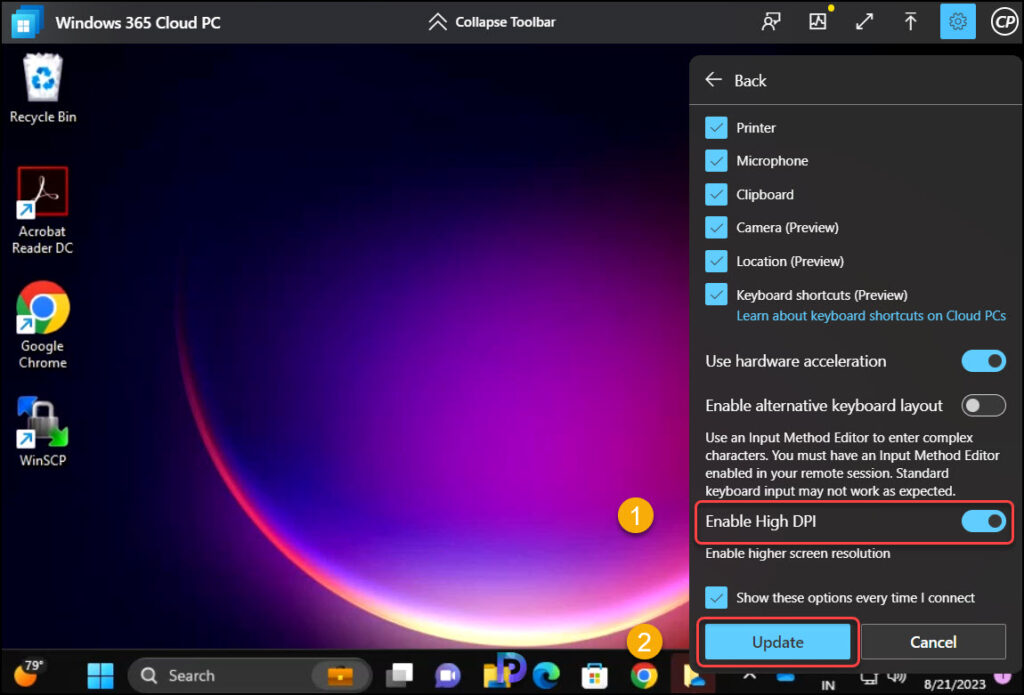
3. Seek the option “Enable High DPI” and turn the slider to the right to enable the feature. Click on theUpdatebutton, which activates the high DPI on the Cloud PC.
On a screen that supports high resolution, after activating the high DPI feature for your Cloud PC, you’ll notice the icons, taskbar, and overall display get sharper. We recommend viewing the Cloud PC on a browser in full-screen mode because high DPI works best when the Cloud PC is set to use the full resolution.

